
DIY Facials: The Ultimate Guide by Pro Estheticians
Share
Sometimes we gotta take matters into our own hands. Sometimes those "matters" are obtaining beautiful skin.
Often we find that we need to be economical with both our time and money but we still need to take time to ground and pamper ourselves.
How you ask?
By treating ourselves at home with an easy, low-cost DIY Facial Treatment.
Take it from us, a team of estheticians and skin practitioners for the past two decades: there are no excuses.
While we often advocate getting your skin assessed and your regime curated by a pro, there are definitely excellent DIY options.
Skin rejuvenation can be both convenient and accessible by following these simple steps.
They are a modified version of what we do during the real deal because some things you cannot do (or don't have equipment for).
Still, this DIY Facial will leave your complexion feeling clean, hydrated and smooth.
Step 1: Cleanse & Exfoliate...Starting with a clean base
The first step of any facial is to cleanse because removing dirt, pollution, and excess sebum prevents surface impurities from contaminating the skin.
While using a good face wash starts this, cleansing is furthered by exfoliation.
Peeling the skin sloughs away debris, promotes cell-turnover and allows our products (and next steps) to penetrate better.
While there are many considerations to exfoliation, when doing this at home I suggest you use a gentle scrub or a peel.
Don't be overzealous about peeling and leave any aggressive treatments to the pros.
For a gentle option, try our Black Currant Peel. It's so gentle that some people use it on a daily basis. It's also awesome for pollution damage (yes, it's a very real thing!) and clearing away daily debris.
Beyond this, you can make your own peel.
Many fruits and vegetables have natural enzymes that digest dead skin cells, so simply mashing a tablespoon of these makes a great treatment. Apply crushed apple, banana or papaya for five minutes before rinsing away for smoother, brighter skin. If you have hyper-sensitive skin, dilute this in a 1:1 ratio with a spoonful of plain, organic yoghurt.
Step 2: Steam
Steaming your skin is beneficial for sweating out impurities and pore-congestion.
This step is imperative to do if you plan on doing extractions, but is also good for clarifying when done on its own.
Simply bring a pot of water to a boil, remove from the hot plate, then add herbs from your pantry. Chamomile tea has soothing properties, while sage leaves disinfect blemished skin. Hover six inches from the pot, draped with a towel to entrap the steam. Do this for up to five minutes.
Step 3: Perform a Face Massage
Massaging the complexion is excellent for increasing circulation, which helps to treat dullness and oxygenate the skin.
This is best done after steaming, as your pores are open and prepped to absorb oil.
Use an all-natural oil in your massage to give you more glide and nourish the skin. Olive or coconut oil work best for most skin types and readily found in most kitchens. Drier skin types can benefit particularly from camellia and raw argan oils, while oily or acneic complexions are treated well with cumin (nigella) oil.
While there are many massage techniques, start with simple sweeping motions. Done in an upward direction, this helps with lifting and promoting collagen production - done gently in a downward direction, this helps with drainage and treating puffiness.
Need a tutorial? Yeah, that's simpler. Check out our video pro guide to facial massage.
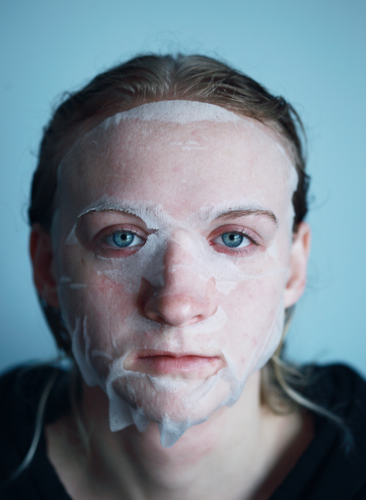
Step 4: Apply a Treatment Mask
Now that the skin has been infused with your vegetable-oil treatment, it is ready for a mask. Masks help to push the oil deeper into the skin and offer therapeutic benefits.
Choosing the right mask is based on your skin type and needs. Dry skin types will want to use one that is nourishing, while sensitive skins should use hydrating masks as they help calm irritation and strengthen your barrier function.
Need something multi-talented? Our White Tea Meditation Mask soothes, hydrates and heals.
For some homemade masks, you can use a simple egg white - or a spoon of organic yoghurt.
Step 5: Tone & Moisturize
End your treatment by toning and moisturizing to balance the skin’s PH and lock in hydration.
Along with applying a toner and moisturizer, you should also treat the eyes and lips. Estheticians call these "finishing products" as they seal in replenishment to your delicate areas. Pro tip: use your eye cream on your lips for an extra boost.
Image by Sharon McCutcheon via Unsplash